Feeds:
Posts
Comments

Posts Tagged ‘challenge’

Birthday card

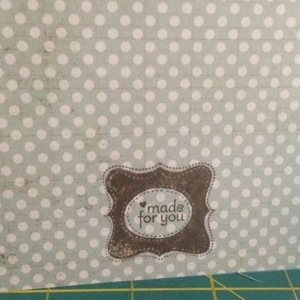
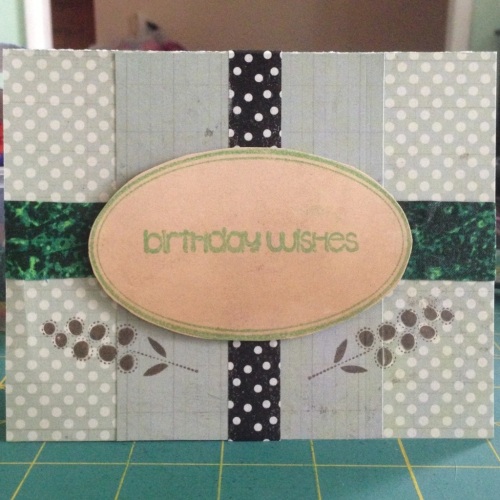
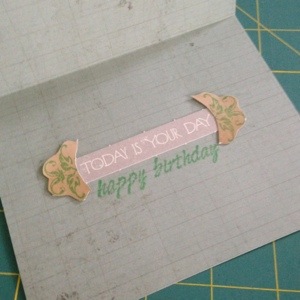
Here’s a cute little birthday card I made using the Critter Sketch challenge of the week.

20130419-150826.jpg

20130419-150901.jpg

20130419-150913.jpg

I decided to list the products just for fun and to show how many elements go into making a simple card.

Products used:
Card paper – Lily Bee Design “Jingle frost”
Oval paper – Glitz Design “uncharted water” line
Oval stamp (ends used on inside) – the girls’ paperie “jubilee”
Green ink – craft smart “Kelly green”
Brown ink – Tim Holtz Distress Ink (Ranger) “walnut stain”
Green tape – my homemade fabric tape
Dot tape – Smash tape
Flower stamp & made for you stamp – Stampin’ Up “best of everything” set
“Today” Sentiment – Authentique notables “uncommon” collection
“Happy birthday” & “best wishes” stamps – Kaiser Craft
(Other tools: glue dot runner, circular cutter, self healing mat, ruler, scissors, dimensional foam stickers)
Read Full Post »

Day 29: Create a vase, bowl or other home decor item

Finishing up the challenge with a failure! It was an experience though. I saw a beautiful bowl here made out of yarn and paste (like for paper mache). Mistake #1: I tried to make it with the kids. Mistake #2: I used dark yarn. Mistake #3: ???? It dried really ugly with pasty flakes on it. Anyway, here are my bowls.


The white bowl (Hayden’s) probably looks the best since the paste didn’t affect the color and it is nice and sturdy.


My red bowl is really too thin, but the coloring isn’t too bad.


The purple bowl (Benjamin’s) is really ugly.  It’s very sturdy and solid, but the paste really made the purple look horrible. This craft also made a huge mess. But again, we had fun making them!


Read Full Post »

Day 28: Design a coffee cozie

I did the wrong challenge today. So we are going to pretend that today is the coffee cozie day. What I really should do is go edit the day where I listed out what everything was going to be and then you would never be the wiser!

I present, a coffee cozie two ways:


 The cup sleeve (which I would use on a paper or styrofoam cup, not a travel mug) is just a stretchy band. I started with a foundationless double crochet row and worked in rounds with the right side facing. Alternate a front post double crochet and a back post double crochet.

The mug cozy design is not original to me, but there were many like this out there so I wouldn’t know who to credit. I didn’t follow a pattern though. Start by crocheting around in a circle (from a joined chain ring) for a couple rounds, then work back and forth leaving two or three stitches unworked to create an opening for the handle. I did the button loops as I went. The buttons are as follows:
Rd 1: Start with magic ring (leaving long tail), ch1, 4 sc in ring, join
Rd2: ch 1, 2 sc in each sc, join
Rd 3: ch 1, sc2tog 4 times stuffing in long tail as you work, join
End off leaving a long tail for sewing on button, weave tail through the opening to close up the button

Here’s a side view of the mug cozie. I’m talking with my mom about embroidering some felt rectangles that say “I love coffee” to sew onto this side!

A view of the cozies off the cups.

I think the cup sleeve would also make a cute bracelet / armband / wrist warmer.

Read Full Post »

Day 27: Create something using a jumbo hook


That’s my jumbo hook, which you may have seen in the posts about broomstick lace and i-cord, shown next to an F-hook for comparison. I have no idea what size my jumbo hook is and it doesn’t really matter all that much because jumbo hook patterns usually are not gauge-critical.

Jumbo Hook Hat

Materials: Jumbo hook
ww yarn in two colors (mine is acrylic)

Hold two strands together and work as one
Start with a magic ring
Rd 1: ch 1, 6 sc into ring, join (6 sc)
Rd2: ch 1, 2 sc into each st, join (12 sc)
Rd3: ch 1, *(2 sc in next st, 1 sc in next st)* around, join (18sc)
Rd4: ch 1, *(2 sc in next st, sc in next 2 st)* around, join (24 sc)
Rd5+: Do not join, but work in a spiral, sc in each st until desired hat height. (Mine looks to be about 7 rounds of this, so 11 rounds total before the last round)
Last Rd: Sl st in each st and join

This is pretty much your basic sc hat pattern. The amount of rounds you need to increase (rounds 1 through 4) will depend on your hook size, yarn weight, and the circumference of the head for the hat.

And now, some ridiculous self-portraits of me. I’ve decided the hat can be worn two ways.

The first way is like a skull cap. Or in my case, a retro swimming cap look.

And the way I will likely wear it – pulled back on my head so that it looks like a bonnet-type thing or Amish head covering. Good way to hide a bad hair day…or maybe it makes it worse. You decide.

PS It’s my birthday! When I was growing up, on my birthday my mom and dad would blast Birthday by the Beatles on the stereo first thing in the morning.

Read Full Post »

Day 26: Create a belt, purse, or other accessory

For this challenge, I worked on a project for my mom. I had already made a sparkly scarf and she wanted a little clutch purse to match that was big enough for driver’s license and phone.  If I know my mom well enough, it also needs to hold a lip balm.

I came up with the scarf and the clutch on my own. I don’t have time to write out a pattern, but I can give you the basics. The scarf is just a v-stitch. Chain as long as you want and start the first v-stitch (dc, ch, dc) in the 5th or 6th ch from the hook (counts as first dc and skip two ch), then skip 2 ch and make another v-stitch across, ending with a final dc in the last ch. If you have too many chains for the pattern to work out right, just leave them unworked because you can undo it when you go to weave in the ends. The next row, you ch 3 (counts as dc) and v-stitch in each v-stitch ending with a dc in the top of ch 3.

The clutch is also very easy. I used half double crochet to make a rectangle that when folded over was the size I wanted for my clutch. Once it is the right size, you begin the top flap. My flap uses shells (2 dc, ch 1, 2 dc) with a dc at each end. You work this just like the v-stitch for the scarf except do shells instead. Once I made the clutch, I wanted the scarf to coordinate, so I added a shell edging on the scarf.


I made my own little button to close the clutch. I made a ring and put several single crochets in the ring and joined. Then I slipped stitched across the back through the sc  on the opposite side to made the circle an oval button. The button feeds through the space in the shell of the flap.


In case you can’t see the button and think I’m making you look at one of those stare until your eyes go crossed and you can see the picture, I’ve circled the button.

 I might add a little wrist strap to the corner of the clutch just to prevent dropping, but this yarn (Plymouth 24K) is really stretchy so I don’t think it will work out right.

Read Full Post »

Day 25: Create something not usually crocheted or using a unique material

I was totally going to go the unique material route and crochet a snowflake using…


Dental floss! But it was really gummy even when I used a non-waxed variety. FAIL! So I went the not-usually-crocheted route. Finding a unique pattern was not as fun as I was hoping, but I did find something fun to make that I will be wearing soon.

Masquerade Mask by Priscilla Hewitt. This worked up very quickly and turned out great. Mine bubbles a little bit in places it shouldn’t so I probably did something wrong–I think I could adjust it if I make another one.

Read Full Post »

Day 24: Make something using I-cord technique

I-Cord is typically a knitting technique, but it is easily done with crochet as well. I found several different methods, but I chose PlanetJune’s because it gave the best results. (others Suzies Stuff and The Purse Workshop) I-cord can be used for many projects, but one of the most common uses is purse handles.

This is the beginning of my I-cord. It doesn’t really take that long. I have some ideas for what I will do with my cord, but won’t be finishing today. I will have another unfinished project, as if I needed more!

Roll up the cord and sew for a hot pad or rug. Maybe do different colors and make candy ornaments.


Use as decorative trim on other projects or sewn items.

Roll up the i-cord in a ball and use as a bulky yarn for a scarf etc.

 The last idea is probably what I will do! The inspiration came from Slip Slip Knit.

Read Full Post »

Day 23: Make something using Tunisian crochet

Tunisian crochet (also known as afghan crochet) is where you pick up loops and leave them on the hook and then come back and work the hoops off your hook. It requires a longer crochet hook or any hook without a finger rest. You can also create something very similar to knitting with the Tunisian knit stitch or Tunisian purl stitch.  It will look like knitting on the front, but the back will look different and, as usual for crochet, the work will be thicker.

I found a Ravelry pattern for Tunisian fingerless gloves. I ended up not having enough yarn for two and I made it too small…so if anyone knows of a kid who wants just one glove, yeah, I can hook them up.

I also played around with the leftover yarn and made a rather unappealing headband, but it looks good when worn! I intend to someday embroider on the headband as Tunisian leaves a nice counted cross-stitch type surface, but as you saw with the amigurumi post, I stink at embroidery.

Read Full Post »

Day 22: Make something with filet crochet


It’s a bookmark (modified a little from this pattern). I didn’t weave in the ends yet because I will likely add an edging. Filet really needs blocked to look good as well. It’s pretty easy to do and you can make really intricate beautiful things like this. It’s not my favorite though and gives a dated look most of the time.

Read Full Post »

Day 21: Design a pillow


Easy peesy pillow.  This guy is little (about 10″x10″), but I would love to make a bigger one. The pattern is my own, but the cable pattern came from a fingerless mitt pattern in one of my many magazines. I’m making up for a flaky go on the cable challenge day!

I used a fine sport weight yarn, but I doubled it up except on the edging. It’s also blue though it looks white in the pictures. I am admittedly not a photographer. The back side of the pillow is just plain single crochet.

It would probably look better with a pillow form of some kind, but I didn’t have one so I used polyester fiberfill.

Read Full Post »

Older Posts »